This guide is a result of a personal learning experience in trying to achieve one thing, i.e. getting to show my currently playing Spotify song on the web. You can check out the widget in action, here in my blog. Now here is the good news; you can follow through this guide, do some modifications, and have your own instance of a widget service running!
Before diving in, you will need 3 accounts; GitHub, Spotify, and Cloudflare.
This guide is divided into a few sections,
- Why This Implementation?
- Creating a Cloudflare Worker
- Setting up the Git repository
- Registering a Spotify App
- Adding in Environmental Variables
- Retrieving a Refresh Token
- Profit!
- References and Inspiration
Why This Implementation?
 |
| Seriously, why? |
You might be wondering do we really need to have a middleware designed just for showing this tiny widget? The answer is yes! (fortunately or unfortunately). Let me explain why.
Ideally, what we should be able to do is query the Spotify API with something like this right?
https://api.spotify.com/user/username/get-now-playing
This will return the now playing song of that user. Then we can call this URL from JavaScript and get the information we need, preferably in a JSON format and render it in our HTML DOM. But you see this is just a hypothetical example. If anyone designed an API that can return anything about a user (that's not publicly available) with a simple query like this, they should be sent for some "API fundamentals" rehab.
Seriously though, jokes aside, this is just not possible.
Spotify API (just like any other API) requires you to make use of client IDs, client secrets, and tokens. So now raises the question, we can just include these codes in our JavaScript right? Wrong!
You include those in your JavaScript code, anyone can see them; if there's anything that is taught in computer security, it's to never trust your client-side. So us going ahead and merrily sending the client all the codes won't do us any good at all.
So how can we solve our problem?
It is pretty easy! We shall introduce a little middle-man that would store our credentials (Spotify codes and such) and communicate with the Spotify API for us and send us the data that we need. This is our middleware; built specifically for the purpose of handling interaction with Spotify, effectively hiding all the sensitive information from the world. Now anyone can call our little middle-man from the internet and get our current playing Spotify song, without revealing anything else.
This will essentially look like this,
https://your-middle-man.com/get-now-playing
Kinda similar to our hypothetical example before isn't it? You see, this will return JSON data on your current playing song. Our problem is now properly solved. So go ahead, try this guide out and get your own widget setup!
Creating a Cloudflare Worker
Cloudflare Workers are a serveless solution that allows you to deploy snippets of code all over their datacenters. Cloudflare is generous to provide us with 100,000 requests per day for your Workers, which is more than enough for our little project.
Excited? Let's start by making your Cloudflare Worker.
First sign in to Cloudflare.
You would have met with a screen like this,
Go ahead and give it any name you'd like, that will be your root domain to access all of your Cloudflare Workers.
For an example my root domain for Workers is https://naush.workers.dev.
Once you have got that figured out, click on "Create Worker".
If you got a screen like this, you did right. Now let us change the name of our Worker. Cloudflare assigns a random name, but we would like to have our own.
Left to "Deploy to go live" you have your Worker name, click on it and rename it to "spotify".
Finally, we require the Worker code to paste into the script area. We'll come back to this soon after setting up your repo, so don't close this tab.
Setting up the Git Repository
git clone https://github.com/your_username/Spotify-Widget
Open up the files "player.html", "player.min.html" and replace these two lines in both the files,
var spotifyUser = "Naushikha";
**Add in your own domain and first name.
Commit the changes and push to your GitHub repository.
Now go back to the script section in the Cloudflare Worker tab we left before.
Replace all the JavaScript in it with the content of "worker.js" in the repository.
Click on "Save and Deploy".
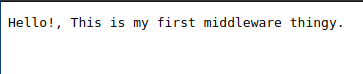
If all went well, when you visit the URL; https://spotify.yourdomain.workers.dev/hello
you should get this message,
You can see the result of my Worker here:
https://spotify.naush.workers.dev/helloIf you don't get that message, you probably missed a step somewhere. Try reading through the steps again.
Registering a Spotify App
Alrighty! Your Spotify worker is up and running in the cloud, but it still cannot communicate with the Spotify API. Let's fix that.
Sign into Spotify using the browser.
Click on create an app.
Give the app name to be "spotify-middleman" and give any description you like.
Click on create.
Click on "Edit Settings".
Scroll down to "Redirect URIs".
Add in the URL: https://spotify.yourdomain.workers.dev/callback
Save the changes.
Do not close this tab now. We need to get the client ID and secret for this Spotify app.
Adding in Environmental Variables
This here is a crucial part, adding in the credentials for Spotify API. Go to the Worker settings in your Cloudflare dashboard,
You have to add in your client ID and secret as variables in here.
Get your client ID and secret from the Spotify developer dashboard.
Retrieving a Refresh Token
Your application is all set up, only thing that is missing is authorization! So let's go ahead and authorize your middleware to use your Spotify account. To do this visit,
https://spotify.yourdomain.workers.dev/authorize
You should be greeted with a screen to grant permissions for your app,
Agree to it, because it is your own app :P
Then you should see your refresh token displayed in the browser.
Copy the token.
Remember where we added environment variables in Cloudflare? You have to go there once again and add in a new variable with the refresh token. Like this,
Your Spotify-Widget is installed and you are all set to reap the benefits!
Profit!
Now start playing something on Spotify!
Open either player.html or player.min.html (minified version) in your browser to see the result :D
If all went well, you will be looking alot like Jim Carrey from Ace Ventura,
Now how do you integrate this into your websites like I did? It is pretty simple, but I won't explain how to do that; the file "usage.html" in the repository demonstrates it. This is a task for you to figure out and learn.
P.S. - You can entirely host your Spotify-Widget from GitHub using that specific embedding method.
References and Inspiration
I found work of José M. Pérez (ex-developer at Spotify) to be very useful, when getting a headstart in developing the frontend for Spotify-Widget.
You can read more from these links;
https://jmperezperez.com/spotify-connect-api/
https://github.com/JMPerez/spotify-player
and also the Spotify API documentation,
https://developer.spotify.com/documentation/web-api/quick-start/
https://developer.spotify.com/console/get-users-currently-playing-track/


Hello :) I just tried this out and queue the Jim Carrey face! It worked!
ReplyDeleteGreat tutorial too, was fun to follow through. good job! x
Glad that you loved it, thank you! x
Delete